Monday, August 11, 2014

$1000 Nursery

It took a while before the nesting kicked in during my pregnancy, but when it did, wow. I spent hours searching online for furniture and other things I needed. I made lists of items I still needed after the baby shower and collated the lists by stores I intended to purchase the items at. I searched for coupons and sales and deals and made word documents containing the items, by store or website, including their price, taxes, shipping costs, and coupon codes. It was really important that I get the best deals possible because I was limited to a $1000 budget. I can't explain why, but I felt the need to have a legit crib and dresser rather than sticking with baskets in the closet and a pack-n-play. So, this is how I was able to furnish my baby's room for less than $1000.

Some Assistance Please

We decided to register immediately after finding out the gender of our little dude, so the following day we registered at Babies R Us and Target. Multiple places is so helpful because you can cover more brands, people can choose the store closest to them to shop, and you get more bonuses! Babies R Us sends coupons in the mail regularly and Target gives you a great packet of samples and coupons when you register. Both of them have great websites you can refer to as well. We also received a bunch of coupons and samples (even a bottle and a pacifier) from Destination Maternity when I went shopping for some maternity clothes. They also put you on a list that will send coupons to you.

I was pregnant over Christmas, so, we told everyone that if they planned on getting us Christmas presents to refer to our baby registries for what we wanted. Same for our birthdays and any other gift giving occasion.

The hubs isn't in to garage sales or else I would have taken full advantage of the garage sale groups on Facebook. I was also invited to join a Mommy Support group on Facebook in which other mom's sometimes sell or give away their old baby stuff.

Google is a great asset, as well. I used google to compare prices for shopping and to find coupon codes.

We ended up receiving a changing table, pack-n-play (bassinet included), glider with ottoman, play gym, and plenty of other great stuff as gifts.  That meant we needed to buy the crib, dresser, swing/rocker, travel system (car seat and stroller),  storage bins, trash can, etc. on our own.

The Budget

First we set a realistic budget, $400 for the crib and dresser combo, $200 for the travel system, $100 for the swing/rocker, and $400 for various other baby stuff. The budget included gift cards we had received as gifts as well as our own money. When we started shopping, it became clear that we were not going to be able to stick to the budget without coupons, sales, and some serious finagling on our end. We shopped and shopped and shopped and finally were able to get everything without going over budget. We weeded out the things we wouldn't need for a while and focused on things we would need for the first six months.

I planned on breastfeeding and was able to obtain a great double electric Medela breast pump through my insurance, so we didn't have to worry about that. Because we don't plan on feeding the baby anything but breast milk for the first six months (at least) we decided not to get a high chair at all or get a whole lot of bottles. I never liked the idea of a diaper genie, particularly because the bags are expensive and a covered trash can serves the same exact function at a quarter of the price. Don't even get me started on wipe warmers - do you really want your baby to be so used to warm wipes at home that he or she can't stand the feel of cold wipes when you are out? Is your baby's butt really so delicate that it can't handle a room temperature wipe? Moving on. The point is to prioritize. Some people absolutely feel the need to have a little baby bath. I didn't. I wouldn't have bought a changing table at all, had a friend not bought one for me because I would have secured a changing pad to the dresser. Prioritizing what we really needed and really wanted was a great way to make sure we didn't go overboard shopping for our new little mini human.

The Room

The following are some pictures of the nursery and where I purchased items.

 Glider: (gift) Burlington Coat Factory, website, coupon, free shipping sale
Pillow: (gift) TJ Maxx
Blanket: (gift) Crocheted by a friend with love.
Lamp: Target - I registered for it before I purchased it so I could use my completion coupon for a 10% discount, $22.
Dresser: Babies R Us, in store, 20% off coupon, $200.
Frames on wall: Wal Mart, $10 each.
Mickey Mouse: Disneyworld, bought on our honeymoon.
Dragon: (gift) Crocheted with love by a friend.
Frames on dresser: one gift, one previously owned.
Swing: Diapers.com, online coupon code, free shipping sale, $130.

Storage Bins: H&M, online, $5 each.
Lion:
Hangers: Target, clearance, $.27 for each set of 10.
Clothes: gifts, various sources, blah blah
Changing Pad: (gift), Target
Changing Pad cover: Target, completion coupon, $15.
Changing Table: (gift), Target
Various Items on changing table: (gifts), places.
Chevron Hamper: TJ Maxx, $12.
Trash can: Wal Mart, $10.


Tree Monkeys Decal: Amazon.com, $50.
Crib: Babies R Us, coupon, $200.
Snoopy & Woodstock: Kohls, $5 each.
Breathable Crib Bumper: (gift) Target.
Bed Set: (gift) Target.


Not Pictured: Britax Travel System in black: Babies R Us, coupons for a total of 30% off, sale, $210.


And that's how I furnished my little dude's nursery for less than $1000. The end.


Sunday, July 13, 2014

10 Lies of Pregnancy

I am not saying that these things are true for everyone or even for most people, but these are things that I have found to be some of the widest spread lies about pregnancy in my experience and through my personal research.  Just a disclaimer: I am 33 weeks pregnant tomorrow.  I don't put a whole lot of stock in when I am due because I know he will come when he is ready and I have no intentions of being induced but it is hard not to count the days.  Anyways, I hope you can relate to this.

Deception, Exaggerations, and Blatant Lies
  1. The time just flies by! The time does not fly by.  The time feels very slow while still pregnant.  I'm sure it will feel fast once it is done.
  2. Pregnant women want to eat crazy things like pickles and ice cream.  Not all women get cravings for ridiculous things.  Not all women get cravings at all.  I have had wants for certain foods, but I haven't needed or wanted anything any more than before I was pregnant.
  3. Pregnant women eat and eat and eat.  Pregnant women are not bottomless pits that can stuff endless amounts of food into their stomachs with no repercussions.  A normal sized meal feels like I ate four plates of food at Thanksgiving dinner.  I feel it for hours and hours afterward.
  4. Pregnant women are fragile.  Pregnant women need to protect their little peanut, sure, but that doesn't mean that they can't do weight lifting, go running, exercise at higher than moderate levels, or participate in certain sports.  If you were training/exercising at a certain level before pregnancy, you might be able to keep that level up to a certain degree.  Don't try to increase the weight levels and play contact sports like football (I had to sit my season out), but see what works for you.  If you didn't exercise before, it is a good time to start (at low to moderate levels).
  5. Pregnant women can't eat honey.  Maybe I was just offended by this one because of how much I love honey, but people tend to think that we can't eat honey because babies can't digest it.  The good and somewhat obvious news is that a full grown woman can digest honey which is the important part of this whole deception.
  6. Every kick is magical.  Lies.  When I get kicked in the ribs until they are sore, it's hard to think of it as magical.  Also, gonna say getting hit in the round ligaments is just unfair.  It feels like getting hit in the "funny bone."  In all honesty, it's impossible to be angry at the little guy and I love that I can feel him getting stronger, but it is still downright uncomfortable at times.
  7. Outtie bellybuttons are so cute!  Blatant dishonesty right there.  I find it incredibly awkward when my bellybutton enters a room before I do and there is nothing attractive about it. 
  8. Your boobs will get so nice and big!  Big is truth, nice is deception.  Big boobs are troublesome! They are hard to contain and just flop around rather than being useful.  I find them incredibly bothersome and too big to be pretty.  No offense intended to women with big boobs.  I don't like them on me.
  9. Pregnant women are emotionally unstable.  I won't deny that I have had emotional moments.  I almost swore at my own mother and then started crying once, but these moments are extremely few and far between. You might have to be the judge of this one because I feel like one emotional outburst in nine months is not that bad, but that might just be my opinion.
  10. At least you don't have your period!  This is the biggest BS.  There is a little human growing inside a little tiny organ that has to keep stretching and stretching to accommodate it.  Let's just go ahead and acknowledge that it feels like cramps.  Add the extra hormones swimming around and the diminished immune system and you have a nine month long period minus the blood, which I hear comes back with a horrendous vengeance after the birth. Update: I still haven't had an actual period, but I bled for six weeks after giving birth. I thought it would never end.
Still think pregnancy is just magical?  In certain ways it is.  A beautiful little human being being is developing inside you and when it comes out it will be the center of your universe.  I have never been one to sugarcoat things.  There are part of pregnancy I like and parts I don't.  When my baby boy is born I might have a very different view of what pregnancy was like, but someone needs to bring these untruths to the attention of women about what pregnancy is like and what you can and cannot do.

Update: three months have passed since his birth and I still don't feel any better about pregnancy.

Lazy Girl Chocolate Chip Coconut Pancakes

It isn't that often that I feel like making pancakes.  The urge usually strikes when I have no cereal or oatmeal or anything else quick to eat.  That's why I have a box of complete pancake mix in my cabinet, for just such an occasion.  Laziness does not have to mean that food doesn't taste as good.  It can just mean you get to eat delicious food faster, hence this recipe.

By the way, whoever invented the pancake box opening is an evil human being. The directions should read, lift tab to open, attempt to put contents into measuring cup, shake the box to allow contents to flow out, spill contents everywhere, retry because you didn't get enough, rip top of box open, spill even more of the mix, jam box closed as much as possible, clean counter, and cry quietly in frustration. I guess that wouldn't fit on the box though.

Chocolate Chip Coconut Pancakes
  • 2 cups complete pancake mix
  • 1 3/4 cups water
  • 1/4 cup sweetened coconut flakes
  • 3/4 cup chocolate chips, separated
  • 2 tb chocolate sauce
Preheat a skillet or large frying pan to medium heat. While it heats up, whisk pancake mix, water, coconut flakes, 1/2 cup chocolate chips, and two tablespoons chocolate sauce.

Measure1/4 cup scoops of pancake mix into the pan.  Sprinkle a few of the remaining chocolate chips on each of the pancakes.  


When bubbles begin to show up flip the pancakes. Use a spatula to lift the edge of a pancake to check if it's done.  Normally this is the part where I would say that it would be golden brown, but I'm not the best at that and the pancakes have chocolate sauce in them. 


Top with syrup and chocolate sauce.
Try not to eat entire batch.


Give up and eat entire batch.

Family Photos

Almost immediately after having my little man, a photographer I follow on Facebook offered to do a photoshoot of our newly expanded little family.  He has been one of my favorite wedding photographers ever since I saw him working a friend's wedding and I got to see the pictures. Naturally, I was super excited to do the shoot. This is the result. You can see more of his work on his website: scrolevision.com.


Maternity Photos

A good friend of mine does photography as a hobby. She could charge because she is awesome, but she doesn't because she is awesome. (Like what I did there?) Anyways, these are the photos.


Friday, April 25, 2014

My Birth Story

Making the Choice to go Natural

I chose to go with a natural, out-of-hospital birth as a result of watching the Business of Birthing and More Business of Birthing on Netflix.  These documentaries by Ricki Lake explore natural birthing and the medical system.  They teach explicitly about midwives, birthing center and home births, doulas, and the basic ins and outs of natural labor.  These documentaries, coupled with my own research on the rise of mental health disorders in children (which has been positively correlated with the rise of traumatic births) convinced me that natural was the way to go and the hospital was not the place for me.  I heard many stories of women being pressured into things that they didn't want at the hospital as well as stories in which the women's birth plans were respected, but in the end, I didn't want to chance it and I wanted to be able to move freely around during labor, without an IV or monitor.  I was lucky to be able to find a local birthing center that was just beginning, headed up by a certified nurse midwife with plenty of experience.  I loved her laid back approach and how she would give me time at every appointment to ask her questions.  She was very supportive while my husband and I took our time trying to decide on whether to give birth at home or in her birthing center and the other ins and outs of birthing. If you live in the southwest Michigan area and are interested in home or birthing center birth, I highly recommend her.  This is her website.  I was also able to find a fabulous doula that brought along (with my permission) her assistant who does birth photography.  She is awesome and worked with me a lot to prepare me and the hubs for labor as well as providing comfort measures and support during labor.

My Birth Story

My estimated due date was April 14, 2014. The night before my due date I woke up with some contractions.  They stuck around for about an hour and a half before stopping altogether.  I was so disappointed, but went back to sleep knowing that my body was preparing itself for labor.  Rather than call my midwife and doula (who were on call for me) in the horrible hours of the morning, I waited it out and timed them to see if they were legitimate contractions or just practice contractions.  I'm glad I did because it would have been a shame to wake them both up only for the contractions to stop a little while later.

The next couple of days were spent drinking raspberry leaf tea, notifying my boss I wanted to start my leave now rather than waiting for labor to start (research suggests women who start leave before labor begins have a decreased chance of having c-section), eating pineapple, going for walks, and whatever else people said had a possibility of inducing labor naturally.  People made jokes about him being late, but to me, he was going to be just on time whenever he decided to come, despite my impatience.

On the evening of the 16th at about 7:25 pm, I was finishing up cooking dinner for the hubs and I, when I felt a contraction and a tiny little gush of something downstairs.  I went to check it out and it was the bloody show.  I started to get a little excited and began to watch the clock.  Another contraction started about seven and a half minutes later.  They stayed consistent for the next hour.  I sent a warning text to my midwife and my doula to let them know that it might be tonight and they advised me to go ahead and try to get some rest.  I ate my dinner and went to bed, timing the contractions the whole time.  I laid down in bed and turned on my hypnobirthing relaxation exercise and attempted to relax, but almost suddenly the contractions became much more intense and closer together.  I couldn't relax through them and I definitely was not going to be able to get any sleep.  I told the hubs he needed to get ready, so he took an online quiz that would be due for one of his classes and jumped in the shower. I called my doula and midwife and we all decided to meet up at the midwife's birthing center.  We stopped at the gas station to get some gas, where my twin sister happened to be working at the time, and she came out to see me.  Coincidentally, I got a contraction right at that moment.  I patted her worried face and the husband finished filling up. At this point the contractions were only a couple minutes apart.

Upon arriving at the birthing center at about 10:45am, I got another contraction right in front of the door as the midwife opened it to greet us.  We made our way to the birthing area where my doula was and I tried to find a comfortable way to deal with the contractions which had grown so intense I couldn't even think through them.  My doula and the hubs both reminded me to relax my shoulders (my tension spot) and to breathe, but I had a very hard time getting myself to loosen up my muscles and allow the contraction to happen.  I found myself calculating how long it would take to get me to the hospital and to the drugs.  I started to fantasize about the needle that would deliver sweet sweet drugs to my body and take the pain away.  My birthing team brought me water to sip on and rubbed my back or squeezed my hips, the hubs ran his fingers through my hair, but nothing was bringing my mind to the peaceful place I had planned on being in during labor.  I didn't fear labor before it started, but it sure was kicking my butt once it got serious.  I asked my doula to ask my midwife to check me (dilation).  I was almost ready to give up and I needed to hear something about how far along I was.


We moved to the bedroom and my midwife checked me.  She told me I was going to like this, I was already at eight centimeters and I could get into the jacuzzi as soon as it was ready.  This was the news I needed to keep going.  Suddenly, my contractions had a purpose, they were bringing my baby boy closer.  By the time I got into the water, it was almost 12:30 in the morning.  My midwife checked me again and I was at nine and a half centimeters.  She gave me the okay to push if I felt the need.  I had a hard time getting traction in the water and ended up hanging on to and pulling on my poor, sweet doula, who took it like a champ.  My birthing team continued to offer me sips of water to try and keep me hydrated and provided encouragement the whole time.  After a while, we decided that I was not productive enough in the water and should get out and try something else.


We moved back to the bedroom and moved around from position to position, trying different tactics each time.  The strongest part of my body (my legs) had no support from my hips, making any squatting positions we tried very difficult.  My husband had to hold me up while I hung on to his shoulders with all my strength and tried to push.  Baby boy was crowning for quite a while, still in his amniotic sac, and I pushed with all my strength to help him find his way out.  His head was a little bit tilted, making it a little bit harder to get him in the right spot.  Between contractions, I concentrated on how to breathe while my birthing team instructed me to sync my breathing with theirs.


The big break came when my midwife instructed me to push toward an imaginary point on the ceiling while the birthing team held my legs and I pulled my head forward.  I visually guided my baby toward that spot on the ceiling as I pushed.  After a few (I really don't know how many, my sense of time and counting was gone) of those kinds of pushes, I felt him start to make some progress.  His head came out, complete with his hand on his neck, and the water finally ruptured.  At 3:45 am, on the 17th of April, 2014, the rest of him slid on out (with a little assistance) and he was placed on my chest.  Nothing can describe the feeling of that little wet baby on my chest.  He was clean, not all gross and gooey like I had imagined.  His little face had prominent chubby cheeks and his papi's nose.


We allowed the cord to stop pulsating before cutting it.  In the meantime, the hubs and I adored our little naked baby.  After a while, my midwife whisked me away to get stitched up and deliver the impressive placenta (they said it was very healthy and maybe the best they had seen - I could be exaggerating, I don't remember everything perfectly).  The ripping wasn't too bad and I definitely didn't care about it considering the little treasure that came from it.  My little baby made all the pain worth it.  We stayed in the bedroom for a few hours after delivery, taking a nap, adoring his little everything, and learning how to breastfeed him.  My birthing team gave me snacks, grape juice, and water to help get me back on my feet, and helped me get dressed and learn how to take care of myself during recovery.  At about 10:30 am, we were allowed to leave, right after my little boy had a nasty blowout and got his first bath and outfit change.


We met my mom at our apartment.  She had picked up breakfast from a local restaurant and held her newest grandchild while we ate.  We spent some time talking before my twin sister arrived as well.  Turns out she had had sympathy pains throughout my labor.  She had tremendous back pain the same time I did, and experienced a few other similar symptoms at the same times I did as well.  Twin power. It's amazing.  We ended up getting to take a glorious nap while my mom and sister watched the baby and cleaned up the apartment for us.  The rest of the day was spent being amazed by this little tiny man and showing him off to immediate family.  He never left anyone's arms except for a quick diaper change here and there.


Santiago Rafael Suarez (Marquez). 7 lbs, 15 oz. 20 inches long, 14 inch head, 13.5 inch chest. He has blue eyes for now, and light blonde/brown hair.


Monday, February 17, 2014

Brown Butter Chocolate Chip Cookies with Nutella Filling

Teaser Photos.  This is what you have to look forward to when you cook this beautiful recipe.


Who doesn't love Nutella?  The answer is no one.  Except for those born without taste buds or hearts.  I love it on toast or bagels with fruit.  I love it on pancakes or crepes with fruit.  I love it in cookies and cakes and custards.  I love it on a spoon or on my fingers.  Nutella belongs in my mouth is the basic point.  So when I came across a recipe for Nutella stuffed cookies on Tasty Kitchen, I was more than a little excited.  I was ecstatic.  Delighted.  Overjoyed.  Psyched.  Stoked.  Moving on.  I only made a couple changes to the original recipe.  I don't care for the sweet and salty combination so I did not add the sea salt the original recipe did.  I also decreased the amount of chocolate chips because they make things extremely difficult and I ended up picking a bunch out as well as having quite a bit left in the bag when I was done.  I also changed the type of butter because I'm a rebel and I prefer salted butter.  I also changed the time it needs to cool. They are some wonderfully soft cookies, so you need to allow them to cool sufficiently to move them at all.  Don't worry, they will not harden (if you didn't overcook them).  Even after cooling for three hours, my cookies were still delightfully soft.

When I found this recipe a friend of mine, whose new nickname is the Crochet Queen, offered me her sister for a batch of cookies.  I settled for crocheted goods for my unborn child.  She created a dragon for my baby boy and is working on a hat too.  I also threw in some Strawberry Lemonade and Flan.  I will be making the Flan in the next couple of weeks for her (recipe to be posted later, but I haven't found anyone that doesn't love my recipe yet).

Brown Butter Chocolate Chip Cookies with Nutella Filling

Ingredients

  • 2 1/4 Cups All-Purpose Flour
  • 1 1/4 Teaspoons Baking Soda
  • 1/4 Teaspoon Salt
  • 1 Cup Salted Butter
  • 1 1/4 Cups Dark Brown Sugar
  • 1/4 Cup Granulated Sugar
  • 1 Egg
  • 1 Egg Yolk
  • 1 1/2 Teaspoons Pure Vanilla Extract
  • 1 Tablespoon Plain Greek Yogurt
  • 1/2 Cup Semi-Sweet Chocolate Chips
  • 1/2 Cup Dark Chocolate Chips
  • 1 (13 Ounce) Jar Nutella
The Fun Part
  1. Whisk together flour, baking soda, and salt in a medium sized bowl.
  2. Melt butter in a small saucepan over medium heat.  When it begins foaming, start whisking constantly to prevent it from burning.  When the butter begins to brown on the bottom of the pan and starts to give off a slightly caramely/nutty scent, remove it from heat and pour into a large mixing bowl.  Allow it to cool for a few minutes.
  3. Using an electric mixer, mix the butter with the sugars until it is well blended.  (I had to break up the brown sugar clumps with my hands.)  Add the egg, egg yolk, pure vanilla extract, and greek yogurt until combined.  Add the dry ingredients a bit at a time on a slow speed until combined.  Gently mix in the chocolate chips.
  4. Put the dough in a storage bag (or cover the bowl) and let chill in the refrigerator for two hours.  Now is a good time to put the Nutella in the refrigerator as well, you will need it chilled.
  5. Preheat the oven to 350 degrees fahrenheit.  Once the dough is chilled, form the dough into balls about two and a half tablespoons large.
  6. Flatten out one of the balls.  Use a melon baller or teaspoon (the melon baller makes it super easy) to scoop some of the chilled Nutella onto the center of the flattened ball.  Carefully pick up the ball and close it up around the Nutella.  Roll the ball a bit to seal the Nutella in.  Gently flatten the ball a little bit, being careful not to crack the cookie (too much).  If you end up with some cracks on top of the cookie it will be okay, but you don't want it too cracked on the bottom and side.  Repeat with the rest of the dough balls.
  7. Place the cookies on non-stick pans about one and half to two inches apart.  Bake for nine to eleven minutes, my oven did it wonderfully in ten.  Remove from the oven and allow to cool for at least five minutes on the cookie sheet.  They will be soft, especially in the middle.  Use a spatula to remove the cookies from the cookie sheet (carefully) and place them on a wire rack to cool the rest of the way.
Now for some drool worthy pictures.  Notice the way the Nutella just melts right out of them as soon as they are broken.  Yum.  I would lick the counter if needed to preserve all the Nutella flavor.  Too far?  I think not.


Look at them all just sitting there innocently.  Not knowing that they are all going to be devoured.


Thursday, January 23, 2014

Cream of Tarterless Play Dough

Working with kids can be so much fun.  Mixing up the activities I use with them is so helpful to keeping them entertained and interested therapy and in skills training.  I am always looking for money-saving ways to provide a variety of activities for kids.  Clearance puzzles, games, crayons; home-made paints and play-dough; free coloring pages, word searches, and crossword puzzles; and other money-saving techniques are some examples of things I am always looking for.

Until now, I never had to provide my own play dough.  Then I found out the Play Doh at work was dried out.  It was time.  I pulled out my Pinterest to find some already-pinned recipes for play doh.  I had one I wanted to use, but while searching through my cabinets for the ingredients I discovered I was short one of the ingredients.  Curse you, cream of tarter, for never being there when I need you.  Next resort: Google, or course.  That was where I found naturalparentingtips.com.  They suggested replacing the cream of tarter with three times the amount needed of white wine vinegar or lemon juice.  So, I needed one teaspoon of cream of tarter, but I replaced it with three teaspoons of lemon juice.

Anyways, here is the recipe.

Cream of Tarterless  Play Dough

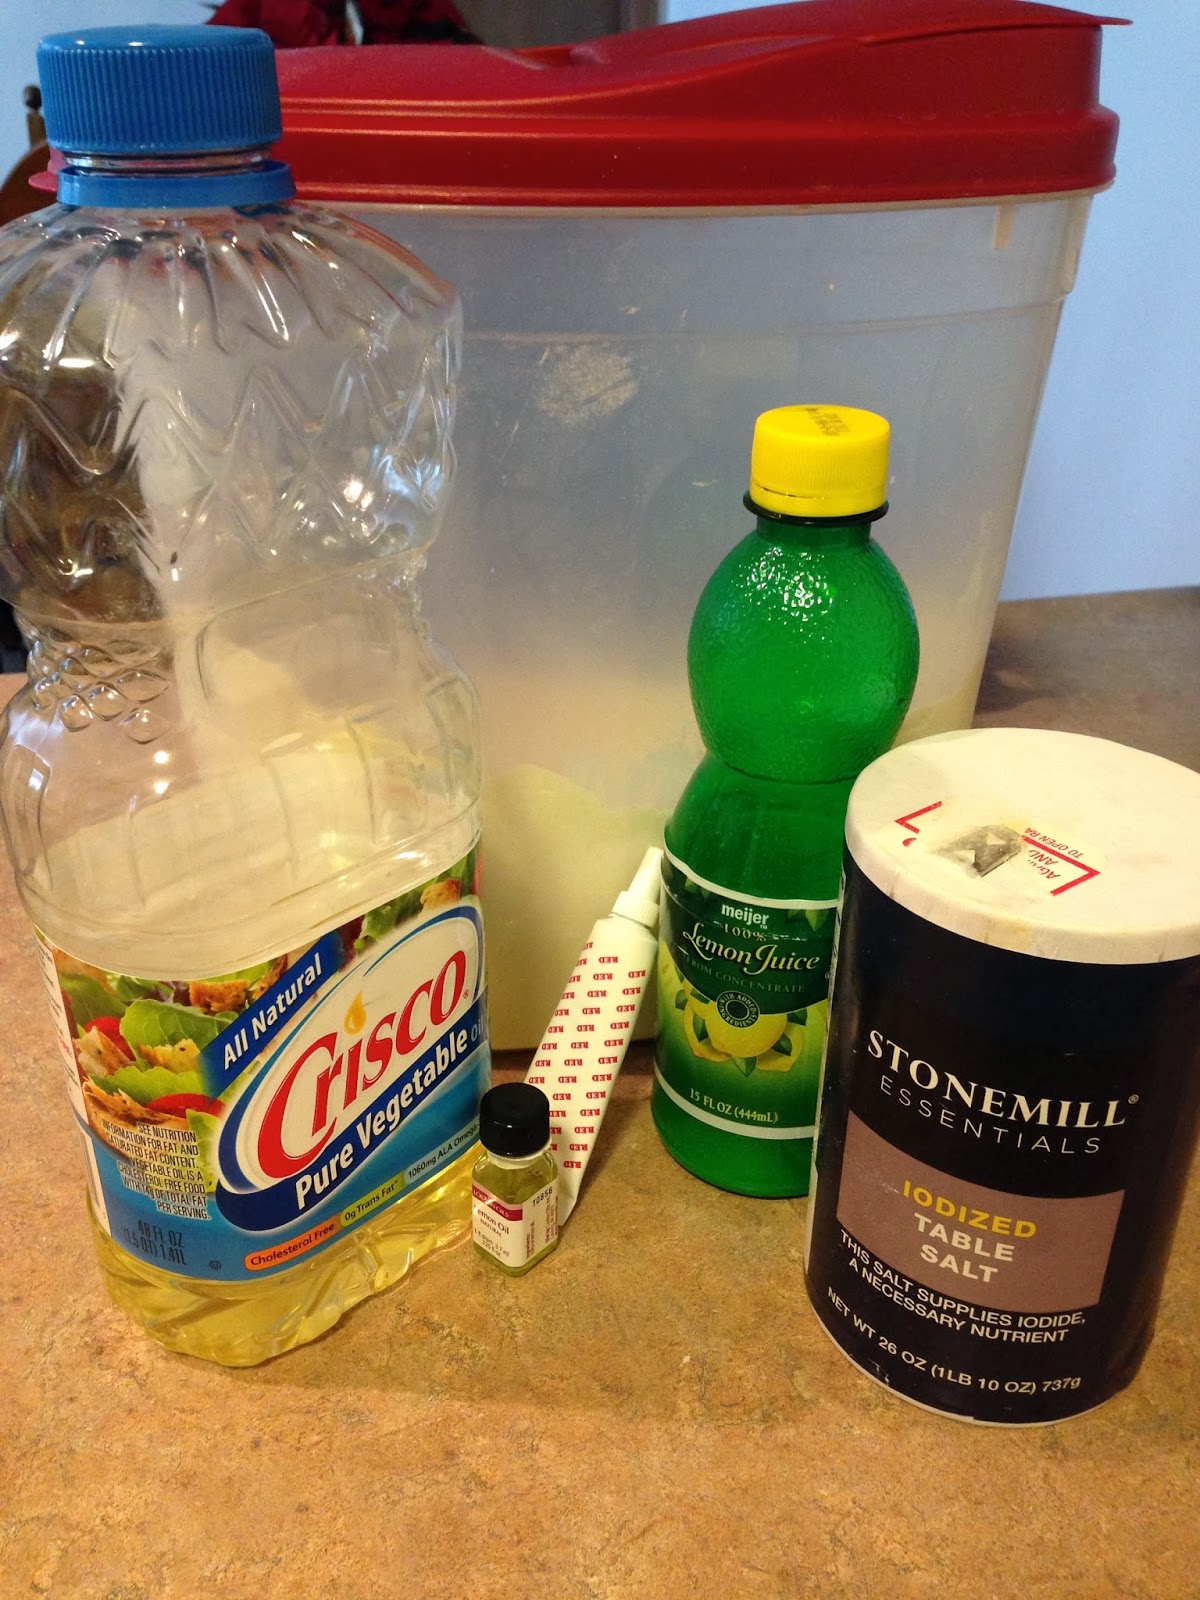
  • 1 cup white flour
  • 1/4 cup salt
  • 1/2 cup water
  • 3 teaspoons lemon juice or white wine vinegar
  • 2 tablespoons oil
  • Food coloring
  • Essential oil for scent (optional)

  1. Mix dry ingredients in a saucepan over low heat.
  2. Mix in water.
  3. Mix in lemon juice.
  4. Pour in the oil.
  5. Continue to mix over low heat until it forms a play dough texture.
  6. Remove from heat and allow to cool down a bit.
  7. Knead in food coloring and a couple drops of scented oil.
  8. Store in an airtight container (or, like me, in a Ziploc sandwich bag inside another sandwich bag).

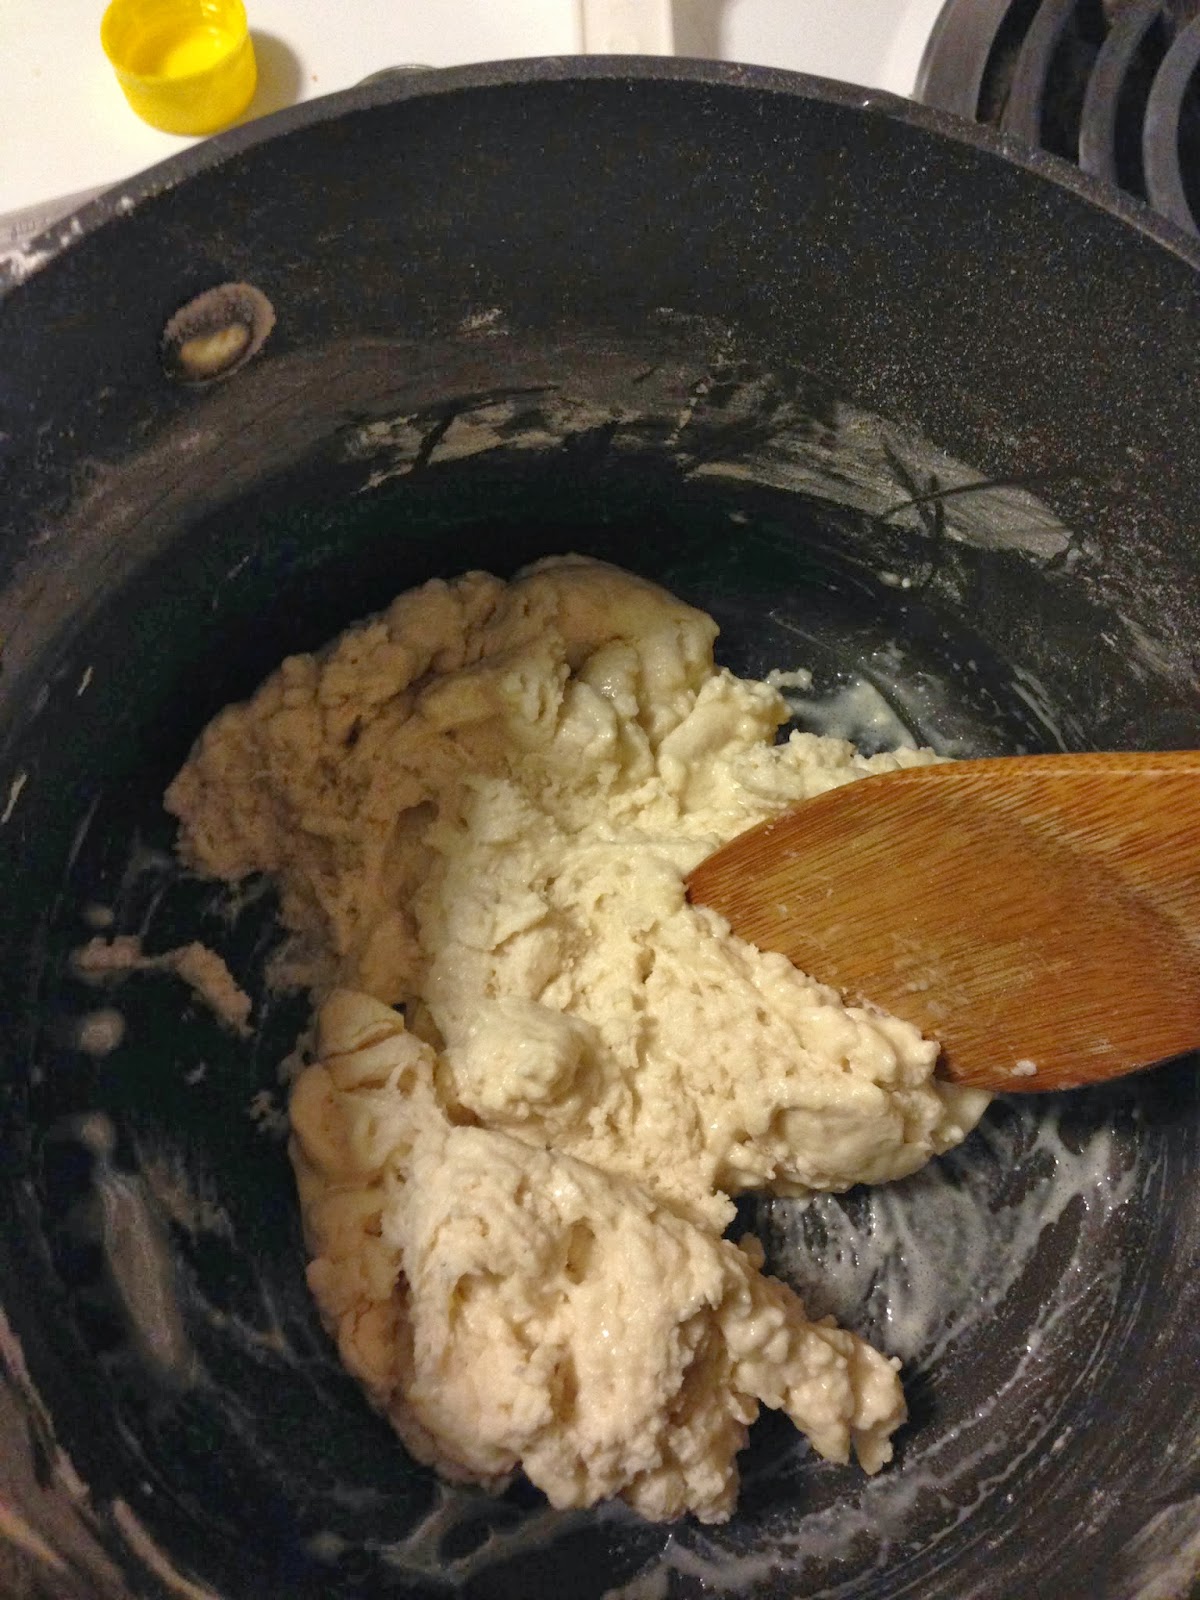
After mixing in the water.
With the oil (I gave up trying to integrate ALL the oil).
I sprinkled some flour on the counter before kneading to help absorb some excess oil before adding food coloring.
Here it is completely done.  The consistency is great.  I like it better than store bought Play Doh because it is a bit softer.  It does firm up a bit after sitting a while, but maintains the awesomely soft, pliable texture.