Monday, February 17, 2014

Brown Butter Chocolate Chip Cookies with Nutella Filling

Teaser Photos.  This is what you have to look forward to when you cook this beautiful recipe.


Who doesn't love Nutella?  The answer is no one.  Except for those born without taste buds or hearts.  I love it on toast or bagels with fruit.  I love it on pancakes or crepes with fruit.  I love it in cookies and cakes and custards.  I love it on a spoon or on my fingers.  Nutella belongs in my mouth is the basic point.  So when I came across a recipe for Nutella stuffed cookies on Tasty Kitchen, I was more than a little excited.  I was ecstatic.  Delighted.  Overjoyed.  Psyched.  Stoked.  Moving on.  I only made a couple changes to the original recipe.  I don't care for the sweet and salty combination so I did not add the sea salt the original recipe did.  I also decreased the amount of chocolate chips because they make things extremely difficult and I ended up picking a bunch out as well as having quite a bit left in the bag when I was done.  I also changed the type of butter because I'm a rebel and I prefer salted butter.  I also changed the time it needs to cool. They are some wonderfully soft cookies, so you need to allow them to cool sufficiently to move them at all.  Don't worry, they will not harden (if you didn't overcook them).  Even after cooling for three hours, my cookies were still delightfully soft.

When I found this recipe a friend of mine, whose new nickname is the Crochet Queen, offered me her sister for a batch of cookies.  I settled for crocheted goods for my unborn child.  She created a dragon for my baby boy and is working on a hat too.  I also threw in some Strawberry Lemonade and Flan.  I will be making the Flan in the next couple of weeks for her (recipe to be posted later, but I haven't found anyone that doesn't love my recipe yet).

Brown Butter Chocolate Chip Cookies with Nutella Filling

Ingredients

  • 2 1/4 Cups All-Purpose Flour
  • 1 1/4 Teaspoons Baking Soda
  • 1/4 Teaspoon Salt
  • 1 Cup Salted Butter
  • 1 1/4 Cups Dark Brown Sugar
  • 1/4 Cup Granulated Sugar
  • 1 Egg
  • 1 Egg Yolk
  • 1 1/2 Teaspoons Pure Vanilla Extract
  • 1 Tablespoon Plain Greek Yogurt
  • 1/2 Cup Semi-Sweet Chocolate Chips
  • 1/2 Cup Dark Chocolate Chips
  • 1 (13 Ounce) Jar Nutella
The Fun Part
  1. Whisk together flour, baking soda, and salt in a medium sized bowl.
  2. Melt butter in a small saucepan over medium heat.  When it begins foaming, start whisking constantly to prevent it from burning.  When the butter begins to brown on the bottom of the pan and starts to give off a slightly caramely/nutty scent, remove it from heat and pour into a large mixing bowl.  Allow it to cool for a few minutes.
  3. Using an electric mixer, mix the butter with the sugars until it is well blended.  (I had to break up the brown sugar clumps with my hands.)  Add the egg, egg yolk, pure vanilla extract, and greek yogurt until combined.  Add the dry ingredients a bit at a time on a slow speed until combined.  Gently mix in the chocolate chips.
  4. Put the dough in a storage bag (or cover the bowl) and let chill in the refrigerator for two hours.  Now is a good time to put the Nutella in the refrigerator as well, you will need it chilled.
  5. Preheat the oven to 350 degrees fahrenheit.  Once the dough is chilled, form the dough into balls about two and a half tablespoons large.
  6. Flatten out one of the balls.  Use a melon baller or teaspoon (the melon baller makes it super easy) to scoop some of the chilled Nutella onto the center of the flattened ball.  Carefully pick up the ball and close it up around the Nutella.  Roll the ball a bit to seal the Nutella in.  Gently flatten the ball a little bit, being careful not to crack the cookie (too much).  If you end up with some cracks on top of the cookie it will be okay, but you don't want it too cracked on the bottom and side.  Repeat with the rest of the dough balls.
  7. Place the cookies on non-stick pans about one and half to two inches apart.  Bake for nine to eleven minutes, my oven did it wonderfully in ten.  Remove from the oven and allow to cool for at least five minutes on the cookie sheet.  They will be soft, especially in the middle.  Use a spatula to remove the cookies from the cookie sheet (carefully) and place them on a wire rack to cool the rest of the way.
Now for some drool worthy pictures.  Notice the way the Nutella just melts right out of them as soon as they are broken.  Yum.  I would lick the counter if needed to preserve all the Nutella flavor.  Too far?  I think not.


Look at them all just sitting there innocently.  Not knowing that they are all going to be devoured.


Thursday, January 23, 2014

Cream of Tarterless Play Dough

Working with kids can be so much fun.  Mixing up the activities I use with them is so helpful to keeping them entertained and interested therapy and in skills training.  I am always looking for money-saving ways to provide a variety of activities for kids.  Clearance puzzles, games, crayons; home-made paints and play-dough; free coloring pages, word searches, and crossword puzzles; and other money-saving techniques are some examples of things I am always looking for.

Until now, I never had to provide my own play dough.  Then I found out the Play Doh at work was dried out.  It was time.  I pulled out my Pinterest to find some already-pinned recipes for play doh.  I had one I wanted to use, but while searching through my cabinets for the ingredients I discovered I was short one of the ingredients.  Curse you, cream of tarter, for never being there when I need you.  Next resort: Google, or course.  That was where I found naturalparentingtips.com.  They suggested replacing the cream of tarter with three times the amount needed of white wine vinegar or lemon juice.  So, I needed one teaspoon of cream of tarter, but I replaced it with three teaspoons of lemon juice.

Anyways, here is the recipe.

Cream of Tarterless  Play Dough

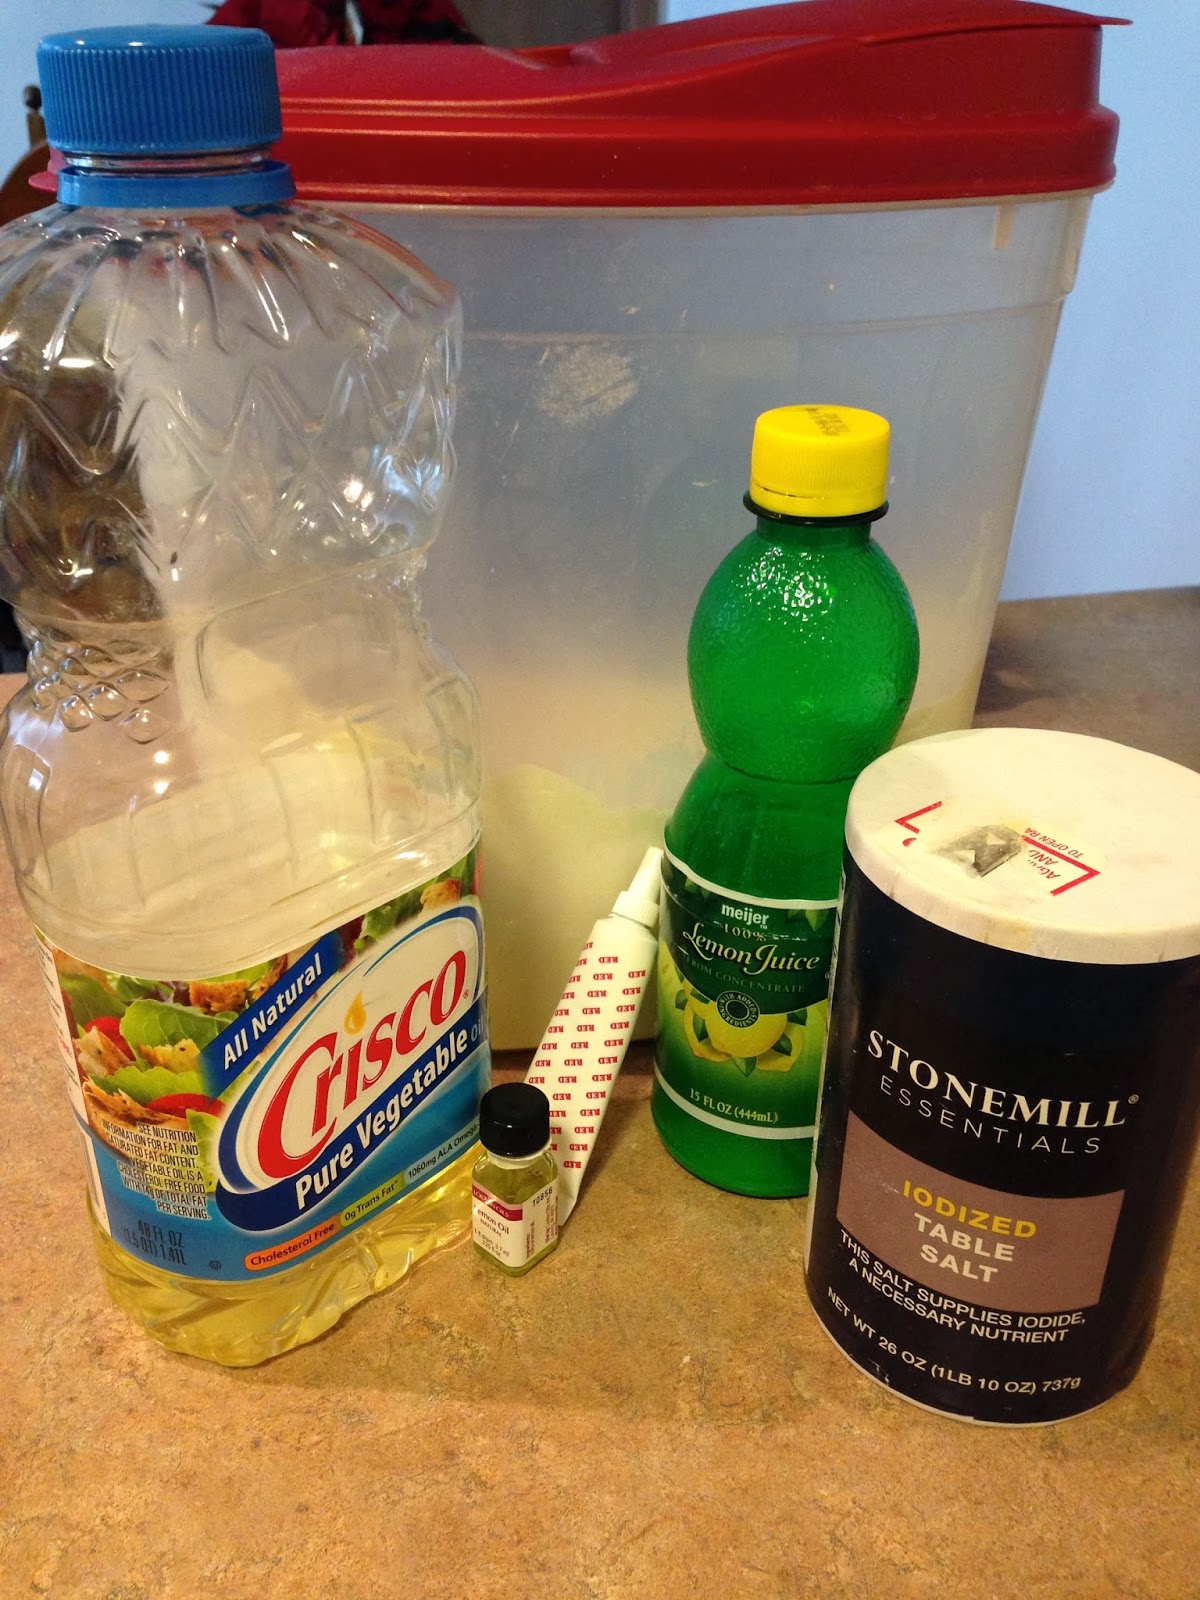
  • 1 cup white flour
  • 1/4 cup salt
  • 1/2 cup water
  • 3 teaspoons lemon juice or white wine vinegar
  • 2 tablespoons oil
  • Food coloring
  • Essential oil for scent (optional)

  1. Mix dry ingredients in a saucepan over low heat.
  2. Mix in water.
  3. Mix in lemon juice.
  4. Pour in the oil.
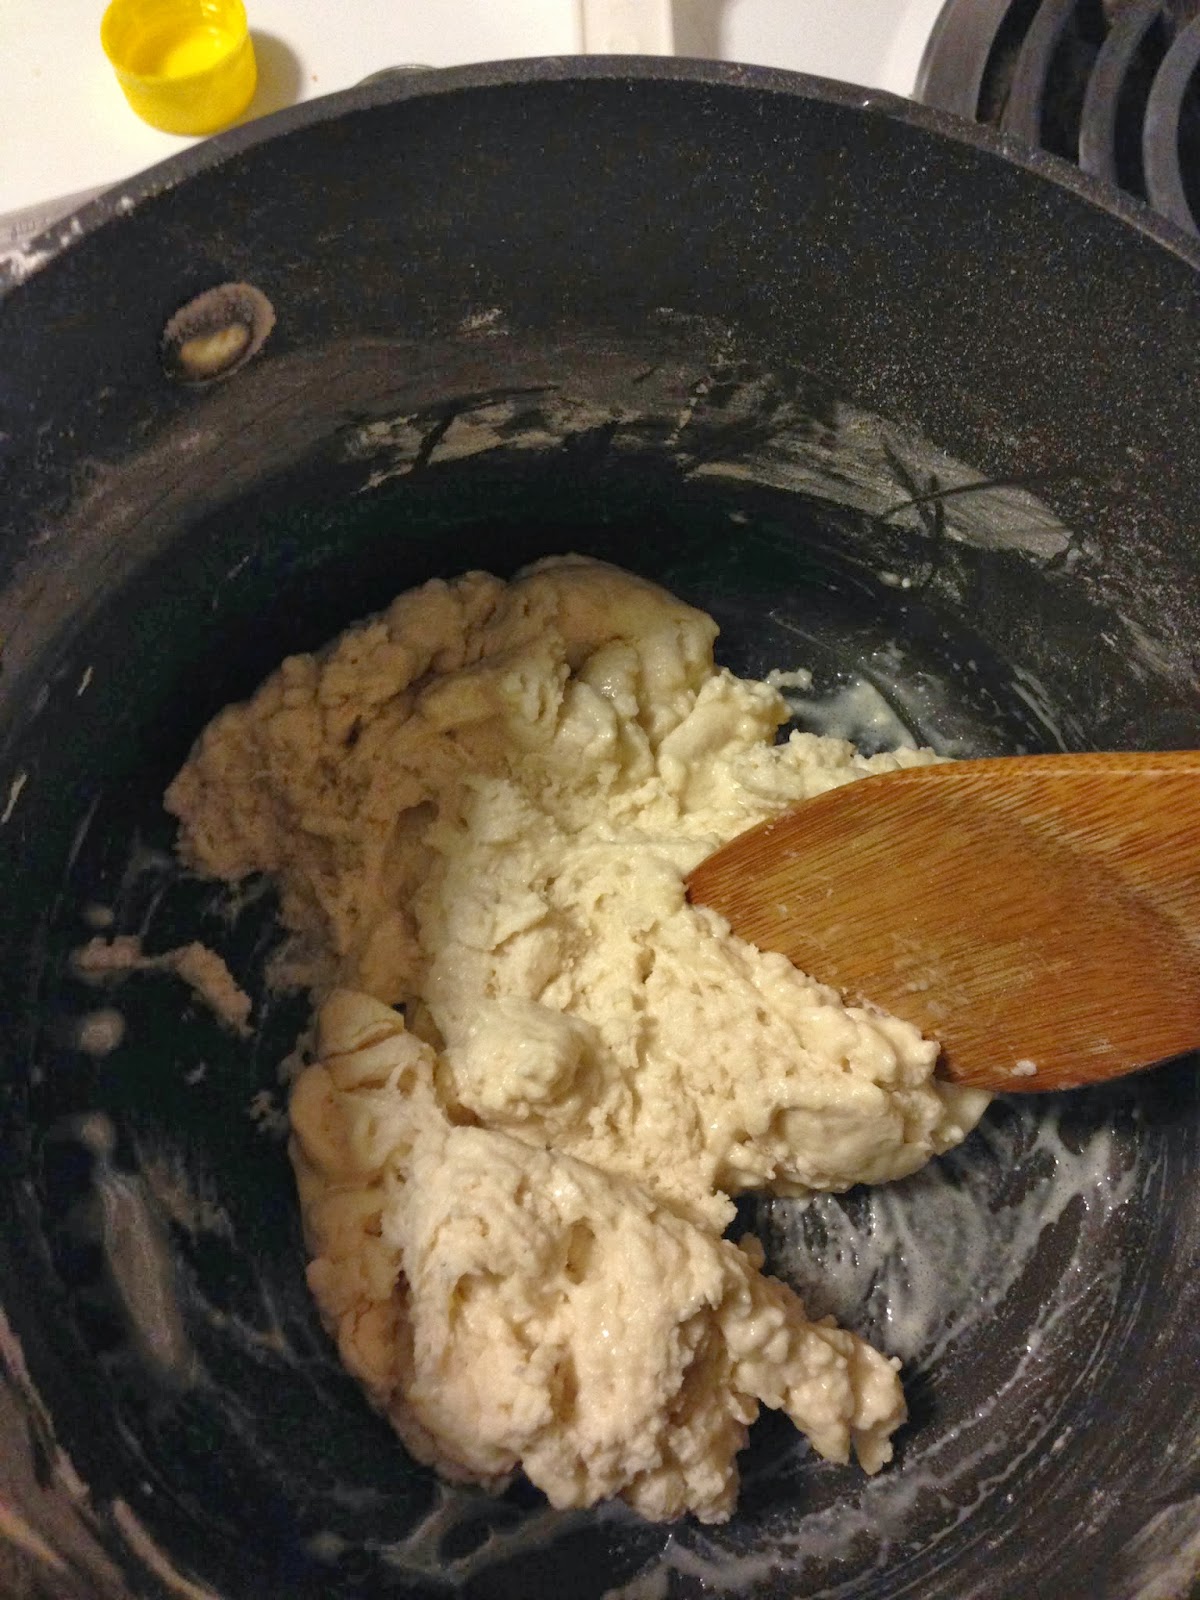
  5. Continue to mix over low heat until it forms a play dough texture.
  6. Remove from heat and allow to cool down a bit.
  7. Knead in food coloring and a couple drops of scented oil.
  8. Store in an airtight container (or, like me, in a Ziploc sandwich bag inside another sandwich bag).

After mixing in the water.
With the oil (I gave up trying to integrate ALL the oil).
I sprinkled some flour on the counter before kneading to help absorb some excess oil before adding food coloring.
Here it is completely done.  The consistency is great.  I like it better than store bought Play Doh because it is a bit softer.  It does firm up a bit after sitting a while, but maintains the awesomely soft, pliable texture.

Wednesday, December 18, 2013

Christmas Ornaments


After Pinteresting for an unreasonable amount of time some time ago, I decided that it would be important that I follow through with some of my pins.  I was on a Holiday Festivity Pinterest "rant" this time and I felt like it would be a great idea if I threw a party for a bunch of girlfriends and decorated ornaments like I had seen on Pinterest.  I organized a Facebook event and invited a bunch of girlfriends from the area that I thought might be interested.  However, this party ended up being a bit of a failure in that no one, save one good friend of mine (Carla!) showed.  More ornaments for us!  Anyways, we gathered all the supplies, air-popped some popcorn, boiled some water for tea and hot chocolate, turned on a Christmas music playlist, and dug in to our ideas and inspiration.  Our inspiration came from here, here, here, and here.  We didn't follow directions though.  I guess you could say we are rebellious, or that we lacked certain ingredients, either way, you would be right.

The Slushed Ornament

You will need: plastic or glass ornaments, craft glue (with a brush is preferable), and white glitter and sugar or instant snow.

Step one:  Paint the top of the ornament with the glue in such a way that it looks like the "snow" is resting on top and slipping down the sides.
Step two:  Pour the glitter on top of the sugar (do not mix).  (Skip this step if you have instant snow).
Step three: Dip the glued ornament in the glitter/sugar or instant snow and allow to dry.
Step four: Use an ornament hook or ribbon for hanging purposes.
Step five: Admire.


The Gold Pinecone

You will need: pinecones, spray paint, ribbon or velvet bows, and a hot glue gun and hot glue stick.

Step one:  Buy or find pinecones (I got a bag of about 14 for $1 at a flash sale at Michael's).
Step two:  Spray it with gold (or whatever color you desire) spray paint and let it dry.
Step three:  Tie a ribbon in a bow and attach a ribbon loop to it. (Or cheat like I did and use one of those little velvet ribbons with a ribbon loop attached to it).
Step four: Hot glue it to the top of the pinecone.
Step five: Admire.


The Snow Pinecone

You will need: pinecones, craft glue (with a brush is preferable), sugar, snow, and a hot glue gun and hot glue stick.

Step one: Paint the glue on top of the pinecone and on the top layers of cone scales/arms/whatever you want to call them.
Step two: Dip the glued on pinecones in sugar until they are coated and allow them to dry.
Step three: Tie a ribbon in a bow and attach a ribbon loop to it.
Step four: Hot glue it to the top of the pinecone.
Step five: Admire.


The Yarn Ball

You will need: Styrofoam balls, craft glue or a hot glue gun and hot glue stick, pretty yarn, ribbon, and a thumb tack or push pin.

Step one:  If you are using craft glue, paint the ball in one diametrical stripe on the ball and another in the other direction.  If you are using hot glue, glue short stripes across where you will wrap the yarn around the ball immediately following.
Step two: Wrap the yarn around the ball either (on top of the craft glue or preceding it with hot glue).
Step three: After you have covered the ball with the yarn, allow some extra yarn for the loop.
Step four: Place a dollop of hot glue or craft glue on the pointy end of the thumbtack or push pin and use it to secure the yarn loop.
Step five:  Tie a ribbon around the base of the yarn loop into a bow.
(Steps four and five can be replaced if you want to skip the bow and yarn loop with this: fold a length of ribbon in half and stab the loose ends with a thumbtack, place glue on the sharp end of the thumbtack and push it into the exposed end of the yarn that you just finished wrapping and hold until dry.)
Step six: Admire.


The Sand Ball

You will need: styrofoam balls, craft glue (with a brush), course sand (or epsom salt) in whatever color you please, mesh ribbon with wire edging, ribbon, a wooden skewer or stick, and a hot glue gun or hot glue stick.

Step one:  Place the styrofoam ball on a skewer of some sort so that you won't have to handle the glue.  The hole will be filled in later.
Step two:  Paint the ball entirely with the glue.
Step three: Pour the sand over the ball and roll the ball around in the sand as it falls. Allow it to dry.
Step four:  Cut about two to two and a half inches of the ribbon, fold it neatly and tie the ribbon that will form the loop around the center and tie the ends together tightly.  Bend the metal edging of the ribbon so that the ends open up into a nice bow shape.
Step five:  Fill the hole that the skewer made with hot glue and cover the hole with a small dollop of glue.  Immediately place bow/loop on top of the glue and hold it there until the glue dries.
Step six: Admire.


The Snowman

You will need: two different size styrofoam balls, craft glue (with, you guessed it, a brush), sugar, thumbtacks or push pins, yarn or ribbon, wooden skewer or stick that can be cut, orange paint or permanent marker, and a hot glue gun or hot glue stick.

Step one: Skewer the styrofoam balls and paint them in glue.
Step two: Pour the sugar on a plate or in a bowl and dip and roll the ball in sugar until it is coated.  Remove the skewer and roll again.  Allow to dry.  Repeat with the other ball.
Step three: Cut the skewer so that it is shorter than the combination of the two styrofoam balls stacked on top of each other.
Step four: Place glue on one end of the cut skewer and push it back into the hole of the ball until there is just enough to attach the other styrofoam ball to.  You will want enough that it will be able to go about halfway into the remaining ball.
Step five: Place glue on the exposed end of the skewer and attach the other ball.  Let the glue dry.
Step six:  Use a length of ribbon or yarn to tie around the neck of the snowman as a scarf.  If you want, glue a cute little hat on.
Step seven:  Place glue on the sharp end of a thumbtack and place it in the head of the ball as an eye.  Repeat this step with the other eye and buttons of the snowman.
Step eight (optional):  Use a ribbon to make a loop and a thumbtack (with hot glue on the sharp end) to attach the loop if you want to hang it.  I chose to leave mine loop (and hat) free.
Step nine: Admire.


Sunday, December 8, 2013

Trimester Two and the Gender Reveal

Tomorrow I will be 22 weeks preggars.  The second trimester, as promised, is infinitely better than the first.  Some improvements: I can drink water and eat most foods except for too much acidic food - which gives me heartburn and makes me sad as a result, increased energy, I now look pregnant instead of fat, my baby is pushing and kicking and punching and dancing and the hubs can feel it, and I have a fabulous excuse to buy new clothes.  Some downsides: my clothes officially don't fit - forcing me to stare at the clothing in my closet in frustration and wish I had more money for maternity clothes, I have really begun to dwell on the whole labor/birthing aspect of this pregnancy, constipation has become a thing, and my extra pillow has now become a belly cushion.

Update:  The whole constipation issue tends to alternate with diarrhea, which is good because I don't go longer than two or three days of being constipated before the diarrhea begins.  Woot… The main problem I have had during the second trimester is acid reflux.  I couldn't even drink a sip of water without acid rising up and burning my throat.  This proved to be a problem because I couldn't drink water which is somewhat vital and I couldn't eat without repercussions.  After attempting to use fresh ginger (yuck!), ginger ale (burn), and ginger tea (worse burn), as well as other acid reflux reducing methods, I asked my midwife for advice.  She suggested Zantac, and let me tell you, it is a life saver.

Gender Reveal Anticipation

My favorite part of the second trimester so far has been finding out the gender of the baby.  We set up the ultrasound appointment for a Saturday morning (typically a no-no for Seventh Day Adventists but a bit of a necessity because of how far I drive for work and my schedule).  We knew about the appointment two weeks ahead of time.  This is too much time.  I am not a patient woman, never have been.  So, in an effort to make others as impatient as I was, I decided to utilize Facebook to build anticipation.  I started on a Monday a few days before the ultrasound, posting three to four old wives tales a day with my answer and which gender that pointed to.  People would comment on what they thought I was having based on my answers or their experience with their pregnancies and/or laugh at the answers.  The old wives tales distracted me enough and passed time a bit quicker.

The old wives tales I posted were:

Did my skin break out or clear up? Sadly I broke out - girl.
Is my skin dry or normal? Sadly my skin is dry - boy.
Is my baby bump high or low? Low - boy.
Did the ring on the string circle or swing? It swung - girl.
What does the Chinese calendar say? Boy.
Am I gaining weight in my stomach or my bottom? I'm all belly apparently - boy.
Do I have more or normal leg hair? Less, actually… - girl.
Have I been sleeping on my left or right side? Left - boy.
Is the baby's heart rate above or below 140? Above - girl.
Am I craving fruit or dairy/protein? Dairy - always, boy.
Are my feet feeling cold or normal? Normal, girl.
Have I been mostly happy or mostly moody? Mostly happy, boy.
Is the hubs gaining or maintaining weight? Gaining! Boy.
Is my nose bigger or the same? Same - girl.
What does the Mayan predictor say? Boy.

My favorite response was to the hubs gaining or maintaing/losing weight.  My friend pointed out that my hubs is always gaining more muscle mass because of how much he works out.  I had to specify that he had plateaued before I became pregnant.  He has really enjoyed the gains he has seen lately as a result, silly guy.

One that I didn't post was that instinct is usually right - about 70% of the time.  Instinct is different from what you want though, so be careful not to be trying to "will" your baby to be something because of what you want.  I knew I was having a boy, I was positive.  I didn't mention this because I didn't want to sway people's guesses, which was the next phase of the torture Facebook friends operation.  Saturday morning, I posted a status saying I would be posting the gender later that evening (to give me time to do a gender reveal to our immediate family and closest friends) and that we were taking guesses.    I took WAY too much pleasure out of people being wrong.  It's a problem.

The Reveal

After the ultrasound and church, we had my family over for lunch and got Sam's family on Facetime for the reveal.  We had set up our Christmas tree and put our gender-revealing ornaments in a box.  We had my mom open the box.  When she opened it, everyone could see the blue ornaments inside.  My four year old nephew, who wanted a girl, responded with an, "awww...." which prompted some laughter.  Turns out, no one was surprised.  I know my husband and I weren't.  Neither were his cousins, or my mom.  The hubs was too excited, which gave it away to anyone that was holding out thinking it was a girl.  After the reveal and making our phone calls to our close friends, we posted the photo on Facebook and basked in the likes.

We had a hard time getting a good picture.  I don't like my face in this one, but it was the best overall.  Also, the baby bump isn't so visible.  Oh well.

Some random pieces of information: the tree skirt is a curtain bunched up and wrapped around the bottom of our lovely plastic tree because tree skirts are unreasonably expensive in stores, the garland is ribbon, and the "S" was our first ornament as a married couple.

When we posted this picture on Facebook, we named the picture Santiago.  We agreed on this name fairly early on, but we are still working out the middle name between our two front runners.  We still have 18 weeks to figure it out.

Teaser

Next week, I will be posting some fun Christmas ornament ideas with how to along with a recipe trial and critique.  Hint: Nutella will be involved.  Yummmm.  I am getting excited already.

Friday, October 25, 2013

Adventures with Cake

My favorite Mel Gibson line from a movie was not from Braveheart or Patriot, it was from What Women Want, which I'm sure more than a few people can agree with me, was not the greatest movie he was in.  In any case, despite the mediocrity of the film and my disdain for his costar, Helen Hunt, he said this during his self-depracating speech to his BFF in the movie, "We [men] are obsessed with our own equipment."  Isn't it true though?  Men are just a bit self-absorbed when it comes to their junk and they seem to think women are just as obsessed as they are.  Just ask Brett Favre, who infamously texted some dick shots and lewd messages to three women, particularly Jenn Sturger, during his short stint with the New York Jets.

Is it true ladies?  Are we just as obsessed as they are?  Does the penis-themed bachelorette party give the wrong impression?  I would love to hear from women if they agree or not.  I don't know about other women, but I find that I can enjoy a nice scoop of ice cream without being obsessed with ice cream, if you catch my not-so-subtle drift.

This whole thought process came to me because a friend of mine asked me if I could make a cake for her friend's bachelorette party.  A PENIS cake.  I asked her about a penis cake mold (which exist) and she didn't like how expensive they could be.  Sooo, because I was curious about whether or not I could make one without a mold, I agreed.

Research

Before agreeing to make the thing, I did some online searching for people that had done this successfully before.  I found a nice British lady that made a horrendously realistic one - complete with semen, some utter failures of tall pink things that looked like something Rapunzel would have lived in, and some that were just okay.  I decided to combine some ideas I found from two different pins from my food board with a "how-to" I found, along with a rough picture of what the nice British lady did.

Let's make a penis!

I only had the instruction that the cake should be large enough for about 20ish people, white cake, and the "skin" should be, to be politically correct, caucasian.  I wanted to do something special because it was for a bachelorette party, so I decided to do "zebra stripes" in the cake.  I was told to use royal blue as the accent color.

Because I am not the snobby baker type (I type this with no judgment, some days I make it from scratch and others from the box) and like to save time and effort, I chose to use boxed cake mixes.  I went with the Duncan Hines Moist mixes because nobody likes dry cake.  I mixed them in separate bowls and colored one of the mixes blue.  I was going for royal blue but I think it turned out more hot blue because I was not willing to use the entire tube of gel coloring, although I did use about three quarters of it, I still needed some of it for later.  I scooped half a cup of white mix, then half a cup of blue mix directly on top until I filled the pans.  Credit for this idea goes to this lovely blog I found through Pinterest.

I followed the directions on the box, using one 13x8 pan and two eight inch round pans.  I baked them all at the same time for 26 minutes at 350 degrees.  I let them cool in the pans for a few minutes before removing them from the pans and letting them cool on wire racks for an hour, making sure they were laying on the bottom, top (uneven side) up.
Next I cut the outer lengthwise borders off the rectangular cake to form the shaft.  I trimmed the edges so that they would appear rounder and evened out the top so that it was flat with rounded edges on the length of it.  I cut one circle out of each round cake, rounding out the edges so that they looked rounder on top.  I cut them in half, scooped out a bit of cake to make a bit of a bowl and filled it with buttercream frosting, because you know... balls.  Next, I cut out the shape for the head out of one of the round cakes I had already removed a ball from.  I used buttercream frosting to stick all the pieces to each other.  This created the shape of the penis.  I kind of thought it looked a little too much like a rocket ship, so I bent the shaft slightly to make it a little more realistic.  After putting it all together I rounded the edges out a bit more with a knife and made sure the pieces went together smoothly.  (I saved the scraps to use for... something... later.)
Without Bend - Rocket Ship
With Bend - Penis

Then I frosted the whole thing with buttercream frosting.  This part is messy because crumbs will mix with the frosting and make it difficult to spread.  Don't worry about how it looks, this is going to get covered with "skin." Quick tip: make sure to clean the cake board and your work space frequently with a damp paper towel to keep it crumb free.  You don't want the crumbs around for the next step.

Going for realism

To make the skin, I used a recipe for marshmallow fondant I found on Pinterest ages ago.  This blogger is a genius for coming up with it because it tastes much better than any homemade or store-bought fondant I have ever tasted.  I placed a bag of mini marshmallows in a microwave-safe bowl (you could do this in a saucepan on the stove), added a few drops of lemon flavoring oil and water to moisten it before microwaving it for 10-20 seconds at a time until it was puffy and ready to mix.  Mix it until it is smooth, then add the food coloring.  To get the caucasian flesh color, I used seven drops of red gel food coloring, three yellow drops, and two to three drops of blue.  The color will lighten, so if it is a little too bold, don't stress out yet.  Add powdered sugar and mix until you are able to kneed it.  Take it out and kneed it on a surface powdered with the powdered sugar.  Keep folding in more powdered sugar until it is the consistency of a firm silly putty.  It will still be kind of sticky.  I made a batch before that turned out too firm to use because of adding too much sugar.  Instead of adding more and more powdered sugar, go for a slightly sticky finish that you can still knead, shape, and reshape.  Clean all the sugar off your work surface.
Before Powdered Sugar
After kneading powdered sugar into it.

Cover the entire work surface with butter.  You heard me.  The whole surface.  If you miss anything you will regret it.  I let my butter sit out for a while so I could spread it easier.  Then, cover the rolling pin with it and your hands.  Spread out the fondant using the rolling pin.  I split the skin in two pieces because it was just too much to handle all at the same time.  I rolled it until it was about a little less than a quarter of an inch thick and spread it out on the bottom half of the cake.  I used my hands to mold it around the shape of the penis and balls.  I purposely wrinkled parts of it to look like the wrinkles and veins of a penis and cut away the excess with a knife coated in butter to prevent sticking.  Then I added the top half and repeated the process.  After getting it nice and smooth with veins and wrinkles and everything, I rolled out the rest of the "skin" and rolled the edge a bit to make it rise for the head of the penis.  I put this piece on top of the head of the penis cake and shaped it out to look like the top view of a penis head, kind of like a helmet.
Pre-Pubescent

I smoothed the whole thing out, cut the "skin" off at the bottom edge and did some final smoothing and shaping.  I wiped the frosting away from the edges of the bottom and began preparing the "pubes."


I used chocolate Twizzlers, cutting it thinly at an angle to make it look like thick hair.  To put them in the cake, I used a buttered toothpick to create little holes in the balls to stick them in.  This completed the realism for me.


The finished product really surprised me.  I was not expecting it to really look so much like a penis.  It isn't perfect, but I think it is pretty good for a first time fondant user/penis-cake-maker.


This is a strange skill to have, the skill of penis-cake-making...

P.S - If you are interested in a neatly laid out recipe, let me know and I can do that.


Friday, October 11, 2013

Then Comes the Baby in the Baby Carriage

My newest experience that I am currently undergoing is *bum-bum-bum* pregnancy.  Not that you hadn't figured that out by the title of this blog, you smart reader you.  There are all kinds of new things that I am learning during this experience.  I will list them in a minute, but first let me tell you the fun story of how I discovered I was pregnant.

From the top...
My husband and I always planned on having our first child at age 25.  I have gone back and forth on whether I felt ready to have a kid or not.  During one of my more particularly maternal moods, I told the hubs that we should stop trying not to have a kid.  Spontaneity.  It has both cursed and blessed me.

Four weeks later, I was having one of those super moody nights, you know what I mean ladies.  I was a bit crazy.  The husband picked up on this and started to feel the same way.  This made me realize that I was moody and about to have the monthly curse.  I told myself to stop being so moody because of the PMS.  Magically and suddenly, I was super relaxed.  You might not know me, but I do, and let me tell you, I am good at managing my moods and thoughts (benefits of being trained in Cognitive Behavioral Therapy).  Except when I am having PMS.  Anyways, sitting in my super relaxed state, I realized that I had just shut down PMS.  Rather than giving myself a pat on the back for being so in control of my emotions, I realized that I was pregnant.  The next day (which was supposed to be day one of my monthly) I took a pregnancy test and found out I was preggars.

I was not excited, but I wasn't regretful.  I knew there was going to be a ginormous change in my life and I didn't know how to feel about it.  I spent the day planning out how to tell the hubs.

Uncooperative man
I have had a plan on how to tell the hubs about being pregnant since I started Pinterest-ing.  I saw a post that gave some creative ways to break the news and it gave me an idea that wasn't on the list.  I went to Kohl's, bought some toddler-sized black Converse low-top shoes, and went home to gift wrap them.  Inside of the box, I taped the positive pregnancy test.  When the hubs got home, I told him I bought him a gift.  He was excited, but went about his business of who-really-knows-what and was about to go play video games (not knowing I had a camera set up recording the event).  I told him to go sit at the table for his gift.  He whined about it, wanting to sit on the couch.  After some convincing (me repeating myself until he obeyed), he sat down.  I gave him his gift and he opened it... and stared.  For a while.  Then he shot his eyes up to me and almost whispered, "You're pregnant."   I nodded, not capable of speech.  After about five or six, "really?!"s, he exclaimed, "My *&#^ works!"  I have video evidence of this, but if you know him, you probably aren't surprised.

The moment
I was living in a surreal emotional state for a while, not sad, not happy, not disappointed, but just not really believing.  The moment I realized I had an actual baby growing inside me was when I was reading up on my symptoms and the baby's development.  I found out that my baby had little tiny fingers and toes.  I started crying.  My baby had itsy bitsy hands with itsy bitsy fingers.  That was the moment when it became real.  The little bud of excitement that had been hiding started to come to the surface.

Secrets
We told my family and some of his family and then sealed it up.  We didn't want to tell anyone until we heard the heartbeat.  So, for two months, we tortured our family members by not allowing them to release the big news.  At my first appointment at 12 weeks, it was time to hear the heart, except the baby didn't cooperate.  My midwife wanted to make sure everything was okay, so she sent me in for an ultrasound.  It was pretty amazing.  The baby looks like a little, tiny, giant-headed, human.  Just chilling in there.  Our baby was fine, of course, so we finally got to tell people.  Having people react so excitedly fed my energy and helped me to become more excited.  I already have several babysitters lined up.  Telling people was a lot of fun too.  I sent out text messages to some of my closest friends and family that simply said, "I bought a pair of shoes that I can't wear for a while, can I show you so I don't have to wait?"  When people said yes, I sent them a picture of the little shoes.

Except for one exception.  There was only one guy that made it on my text list.  I didn't think he would care at all.  Then I received a text back that simply said, "I'm coming over."  When he got to the apartment, my husband put the shoes in his hands.  He stared at them for a few seconds before his head shot up in shock.  "You're pregnant!" It was hilarious.

Most people got this picture of our chucks all lined up.  How cute is it that all the shoes are black and white?  Too perfect, I know.

What have I learned
I am about to enter the second trimester next week and I am so happy to be past the awful first trimester.  Things you should know about me before you read the list of the things I have learned:  I drink a lot of water (about 75 ounces a day), I love Zumba and Bosu but am not a huge fitness fanatic, I am typically a pretty healthy person.  Now, enjoy this list of educational insights no one prepared me for.

  • Water has no flavor.  I haven't been able to drink it plain - at all - without feeling sick.
  • The first trimester is basically like having PMS with cramps for three months straight.
  • I have struggled with acne for about 12 years, but it is now the worst it has ever been. Thank you hormones.
  • College frat boys have nothing on the gassiness levels of pregnant women.  This has faded recently for me, but wow.
  • When basically everything makes you nauseated just to think of, food tends to lose its appeal.
  • Doesn't matter if you are showing or not, people still want to touch the belly.
  • Two naps in a day are not enough.
  • Conversely, naps cause headaches.
  • Walking up stairs or down the street becomes a workout.
  • When people find out, they immediately want to know the gender and name.
  • Boobs are unmanageable at this size.  I have a new found respect for big-busted women.
  • The thought of fetus hands is tear-inducing.
  • People will think you are crazy if you tell them you're having a natural birth at a birthing center.
  • People really want you to eat - a lot.
  • A simple cold will have you crying on the bathroom floor, yelling at the hubs when he tries to help.
  • Baths are suddenly one of the best things ever.
  • That little tiny thing inside you takes over your heart before you realize its happened.
I'm sure there will be more to come, but these are the biggies for now.

Monday, July 29, 2013

Charcoal Clay Mask and Simple Granola

My first DIY mask got some attention on Pinterest, but I am here to tell you that the one I am posting today is far better.  I am stuck on charcoal for my face because of how well it pulls out toxins.  I didn't like the liquid texture of my last mask though, so I decided to mix it in with a clay mask.  This improved the texture and quadrupled the effectiveness of the mask.  My love for charcoal masks started with the Origins charcoal mask, but I'm a cheapskate and wanted to find a cheaper option.  Combining the clay mask with the activated charcoal gave me the same texture of the Origins mask and actually gave me better results.

The Clay I used is Now European Clay Powder and you can get it in health foods stores and online using Google.  However, there are many different prices posted online, I paid about $5 for mine at my local health food store and found it for even less (swansonvitamins.com has it for $4.35).  If you have sensitive skin, go with Now Moroccan Red Clay Powder. I use Thayer's Lemon Witch Hazel with Aloe Vera as a toner/moisturizer.  I bought it at my local health food store as well and I like it better than using the harsh chemicals that come in other toners.

Charcoal European Clay Mask

 You are going to need:
  • 1/4 tsp. Activated Charcoal
  • 1 tb. Now European Clay Powder
  • 2 tsp. Water
  • Thayer's Lemon Witch Hazel (or another variation, it also comes in Lavendar and Rose)
Combine charcoal and clay powder in a small plastic bowl and stir.  After the powder is blended, add water one 1/2 teaspoon at a time until you get a nice clay/muddy consistency.  Spread it on your face and along the lower jaw line evenly and allow it to set for about 15 to 20 minutes.  It tingles and tightens as it dries, so don't be alarmed.  However, if you feel the need to avoid some slight inflammation after removing the mask, do not allow it to completely dry.  Remove with a warm washcloth.  Follow with lemon witch hazel (soak a cotton ball with it to apply) to moisturize.  I have oily acne prone skin and have been using the Oil Cleansing Method (blog post to follow) so I don't use regular moisturizers, at most I would use a drop of olive oil if my skin feels dry, but the lemon witch hazel does it for me.
As you can see, my skin was a bit inflamed after removing the mask because I allowed it to dry.   However, the redness subsided after about 20 minutes.  

I loved the consistency of the mask as well as the way it made my skin feel after.  My pores look and feel cleaner and my skin is nice and soft.  I won't be going back to my Origins mask.  Not to say that the Origins mask is bad, I love it, but it costs $23 at Sephora for a tiny 3.4 oz tube.  I can think of better ways to spend $23 (food for example).  Not to mention, the results were better with this "homemade" mask.

All in all, I highly recommend this mask to anyone with normal, oily, acne-prone skin, and/or large pores.  This is great at cleaning out the pores and drawing out the toxins and dirt and crap that create pimples and junk.  I have a way with words, don't I?


Simple Granola

My search for a granola recipe is finally complete.  I have been struggling to find a granola recipe that doesn't have over ten ingredients and therefore, cost a lot of money.  I like this recipe because it keeps things simple and still delicious.  Not to mention, you can customize it to suit your needs.

A BFF of mine sent me the recipe completely on the random and I have loved since.

Basic Homemade Granola
  • 1 cup coconut oil (the recipe points out that you can substitute canola oil or mix half coconut oil and half butter)
  • 1 cup honey
  • 1/2 cup brown sugar (add more for sweeter granola, I know I will next time)
  • 4 tsp. vanilla
  • 2 tsp. cinnamon
  • 15 cups (42 oz) old fashioned oats
  • Other optional additions: crushed nuts, dried fruit, chocolate chips, etc.
Preheat oven to 375 degrees.  

Mix brown sugar, oil, and honey in a small sauce pan and bring to a low boil.  Remove from heat and stir in cinnamon and vanilla.  

Pour over oats in a large mixing bowl and stir until well coated.  (I added crushed pecans to the oats before this step.)

Spread oats out in two or three 9x13 pans (I used one 9x13 and two 9x9 pans because that's what I have and it worked out fine).

Bake at 375 degrees for ten minutes.  Take out and stir.  Return to oven and turn off the heat.  The granola will be done when the oven cools.

Transfer granola to an air-tight container or bag to store.  I added Craisins to the mix after it cooked and it was delicious.

I love the recipe, but I will be making it with butter and more sugar next time.  My husband likes things sweet, and this recipe is just a little bit on the blander side for his taste.